Support > Using Outlook Express with LoHost
To configure Outlook Express to use the LoHost mail servers follow the steps below. For the example we are using Outlook Express version 6.
Start Outlook Express. If the dialogue below does not appear, you
will need to go to the Tools menu and choose Accounts,
click the Add button and choose Mail. Hopefully you
should see the Outlook Express new account wizard, as shown below.
1. Type in your display name. Replace Fred Bloggs with your own name, or department e.g. Acme Inc Sales team. When you have done this, click Next.
2. Type in your e-mail address. You will have received what it should be along with your account welcome information. When you are ready, click Next.
3. Type in the mail server names. The ones below are for UK customers. If you are in the USA, replace .co.uk with .com. When done, click Next. If you prefer you can
use your ISP/connectivity provider's own SMTP server in place of our own, though you will need to refer to them for support with it.
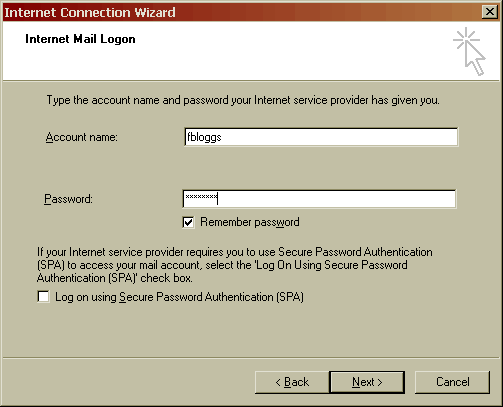
4. Type in your mailbox user name and password. These will have been supplied to you with your account welcome information. Tick Remember password, but do not enable SPA. When done click Next.
5. Click Finish. There is still a little more to do, so read on.
6. You should now see your new LoHost account in the Accounts window. If it is not visible go to the Tools menu (at the top) and click Accounts, then choose the Mail tab.
Double click on your new account, or select it and click Properties.
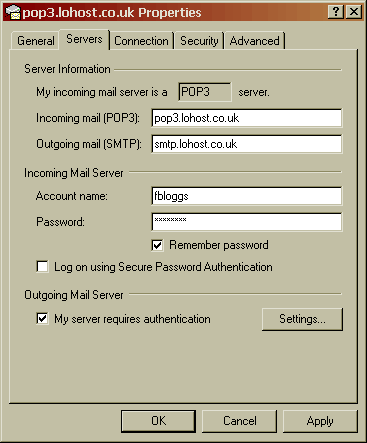
7. You should now be able to see the Properties for your account. Click on the Servers tab. Tick the box beside My server requires authentication.
8. Click the Settings button to the right of the box you just ticked. Make sure it is set as per the example below. When ready click OK to go back.
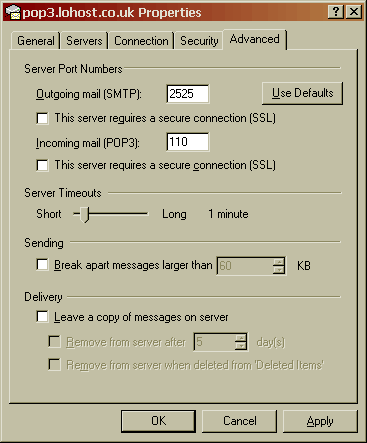
9. If you find you are unable to send messages via our server using port 25, it is highly likely that your connectivity provider has forced you to use theirs. To get around this we
provide SMTP access on port 2525 too. Go to the Advanced tab and set it as per below. When ready click OK.
|
|